How to Create Timer Event with VBA in Excel (with Easy Steps)

- What Is Timer Event in Excel?
- Download Practice Workbook
- Stepwise Demonstration of Creating Timer Event with VBA in Excel
- Practice Section
- Conclusion
- Step 1: Create Suitable Data Table
- Step 2: Inserting VBA Code to Create Timer Event
- Step 3: Create Start and Stop Button
- Step 4: Assign Macro in Start and Stop Button
- Step 5: Execute the Timer Event in Excel
A timer in Excel is used for counting down time. For practical purposes you may need to create this timer event option in Excel. There are several ways for preparing a timer event in Excel. If you want to create that with the application of VBA code, then you have come to the right place. In this article, we are going to show you how to create a timer event in Excel using simple VBA code.
What Is Timer Event in Excel?
Timer event is a setup in Excel that allows the user to track time. With this setup we can calculate the duration of elapsed time and also can keep records of the start and stop time.
Timer event is particularly important for finding time intervals between two events.
Download Practice Workbook
You can download and practice this workbook from the link below.
Stepwise Demonstration of Creating Timer Event with VBA in Excel
In this section, we will show the step by step procedure to create a timer event in Excel. For that we will use VBA code. I will discuss the steps of creating the timer event by using the Excel VBA with proper illustrations. So let’s begin the procedure.
Step 1: Create Suitable Data Table
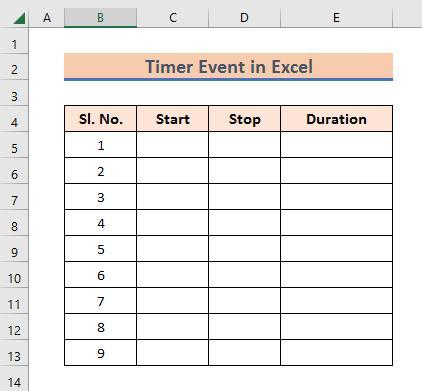
First of all, make a format for creating the timer event. For the timer event we need three columns for the results. That’s why we have created this data table where we can show the Start time, Stop time and Duration time.
Step 2: Inserting VBA Code to Create Timer Event
We are using simple VBA code for this problem. In order to create a timer event, we have to insert a suitable VBA code. And for this:
➤ Go to the Developer tab and then click on the Visual Basic option under the Code group on the Excel toolbar.
As a result, a new window with header “Microsoft Visual Basic for Applications” will appear on the screen instead of the home window.
➤ Next, click the Insert tab and select Module from the menulist.
➤ Now, write the corresponding VBA code. You can use the following.
Code:
Sub StartColumn()
Range("C4:C13").Find("").Select
ActiveCell.Value = Time
Selection.NumberFormat = "hh:mm:ss"
End Sub

Sub StopColumn()
Range("D4:D13").Find("").Select
ActiveCell.Value = Time
Selection.NumberFormat = "hh:mm:ss"
Range("E4:E13").Find("").Select
ActiveCell.Value = Format(Time, "Long Time")
ActiveCell.FormulaR1C1 = "=RC[-1]-RC[-2]"
Selection.NumberFormat = "mm:ss"
End Sub
Next, you need to save the code. You can’t save this in a macro free workbook. You have to enable the macro for the workbook. When you click to save the file, a pop up will appear asking whether you want to save it in a macro-free workbook. Select No and enable macro for the workbook and save the file.
Step 3: Create Start and Stop Button
We have to create Start and Stop button to give proper command.
➤ Go to Insert > Illustration > Shapes and select the rectangular box.
➤ Now, with the mouse cursor, create two buttons and name them as Start and Stop.
You can locate those buttons in a suitable position and give them a nice color.
Step 4: Assign Macro in Start and Stop Button
Assigning Macro for Start Button
➤ Place the mouse pointer on the Start button and press Right.
➤ Then, click on Assign Macro in the appearing window.
➤ And, Select StartColumn in the Macro name box.
➤ Make sure you set This Workbook in the Macros in box.
➤ Then press OK.
Assigning Macro for Stop Button
Similarly,
➤ Place the mouse pointer on the Stop button and press Right.
➤ Then, click on Assign Macro in the appearing window.
➤ And, Select StartColumn in the Macro name box.
➤ Make sure you set This Workbook in the Macros in box.
➤ Then press OK.
Step 5: Execute the Timer Event in Excel
Let’s see how this setup works.
➤ Click on the Start button.
The start time will appear in the first cell of the Start column.
After some time,
➤ Click on the Stop button.
So, the Stop time and the Duration time will appear in their respective cells.
Similarly, you can execute this process again to get more set of timer events.
Note: Make sure to click the Start button before the Stop button.
Practice Section
We are providing the Excel workbook that you can download and practice yourself.
Conclusion
Thank you for making it this far. We have shown you how to create timer event in Excel using VBA code. Hope, you find the content of this article useful. If you have any queries or suggestions please do let us know in the comment section.